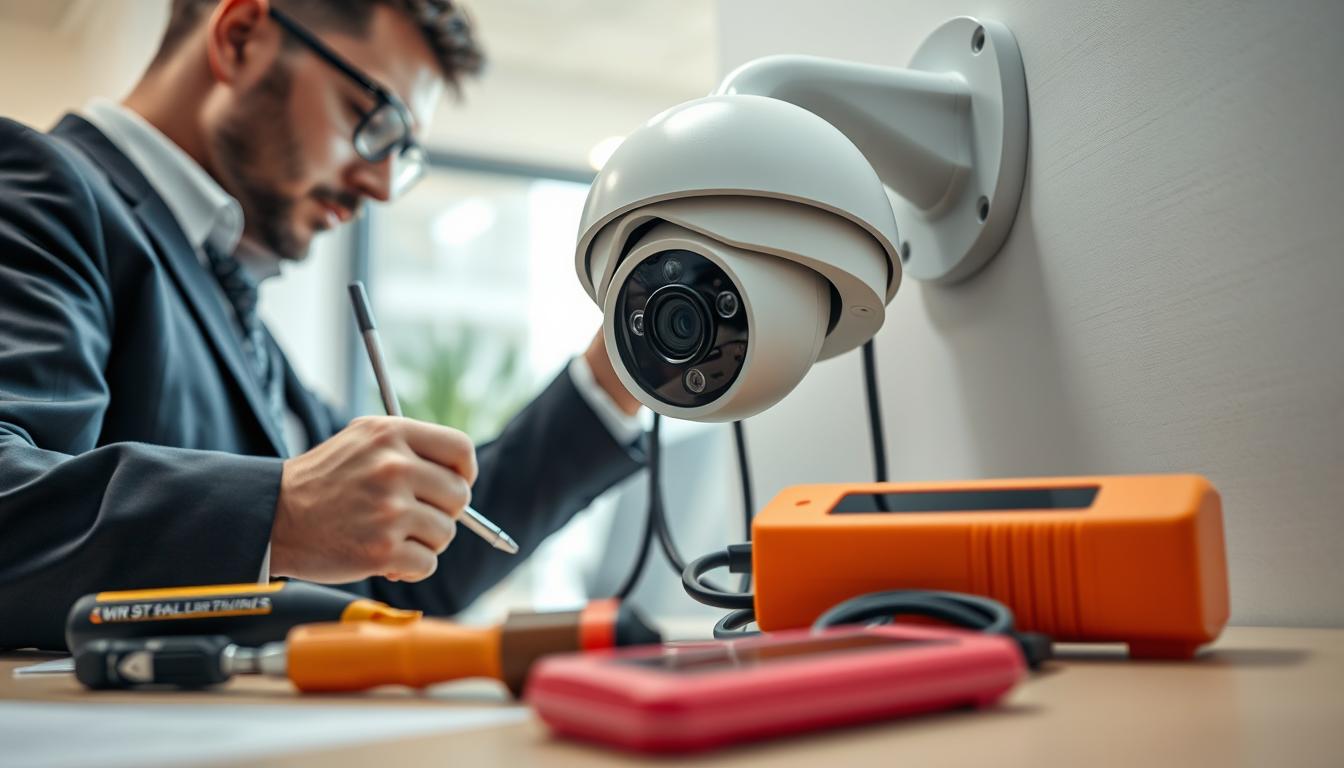
What is the common problem of CCTV camera? Troubleshooting Tips
Identifying one universal issue with surveillance equipment proves challenging. These systems face various frequent technical and environmental failures.
For homeowners and business operators in Singapore, a reliable security setup is non-negotiable. Protecting property and ensuring safety depends on constant, clear monitoring.
Typical malfunctions often originate from irregular power supply or unstable network connections. Image quality can degrade over time, compromising the entire surveillance system.
Singapore’s tropical climate introduces unique hurdles. High humidity and heat frequently impact electronic components and camera lenses.
Key Takeaways
- No single fault dominates; surveillance systems experience a range of common problems.
- Power irregularities and network drops are primary culprits for system failure.
- Image clarity often suffers from environmental factors or lens issues.
- Singapore’s humid climate can accelerate wear on camera components.
- Regular system checks help prevent major security vulnerabilities.
- Basic troubleshooting can resolve many frequent CCTV issues quickly.
- A functioning surveillance setup is critical for both residential and commercial security in Singapore.
Why CCTV Reliability is Critical for Security in Singapore
In Singapore’s densely populated urban environment, consistent surveillance system operation forms the backbone of comprehensive security. Nearly 90% of public spaces maintain monitoring coverage, creating an expectation of protection. This network deters criminal activity and aids law enforcement investigations.
Recent crime rate increases exceeding 25% highlight growing security needs. Residents and business owners depend on functioning equipment for peace of mind. A single camera failure can create vulnerable blind spots in this interconnected landscape.
Unique Environmental Challenges: Humidity, Heat, and Urban Density
Singapore’s equatorial climate presents harsh operating conditions for electronic equipment. Intense humidity and persistent heat accelerate component wear dramatically. Lens condensation frequently obscures critical details in captured footage.
Metal connectors and cable terminals suffer rapid corrosion in moist air. Statistics indicate humid conditions trigger 70% of weather-related surveillance equipment failures. Proper sealing and regular maintenance become essential for longevity.
Urban density introduces additional complications for monitoring performance. Wireless signals face interference from countless competing networks in high-rise areas. Installation logistics grow complex when routing cables through crowded infrastructure.
HDB corridor placements require careful balancing between security needs and privacy regulations. Effective coverage must respect neighbor concerns while maintaining visual clarity. Landed property installations face different exposure risks from direct sun and rain.
The High Stakes of System Failure in Homes and Businesses
When surveillance equipment malfunctions, the consequences extend beyond inconvenience. Homes become vulnerable to theft without recorded evidence of intrusions. Businesses risk significant financial loss and reputational damage.
The deterrent value of visible cameras disappears during system downtime. Criminal elements may exploit known weaknesses in coverage. Restoration of evidence gathering capability cannot recover lost footage from outage periods.
Commercial operations face operational disruptions when security monitoring fails. Insurance claims may require video verification for incident validation. Employee safety monitoring becomes unreliable without consistent camera performance.
Regular system checks prevent most catastrophic security vulnerabilities. Proactive maintenance addresses minor issues before they escalate. A reliable surveillance setup remains non-negotiable for comprehensive protection in Singapore’s landscape.
What is the Common Problem of CCTV Camera? A Top-Level Overview
Rather than searching for one universal fault, focus on four primary categories. These groups encompass most surveillance system headaches homeowners and businesses encounter.
Categorizing the Most Frequent Surveillance Headaches
Power supply issues rank as the leading technical difficulty. Electrical inconsistencies affect a significant 58% of malfunctioning equipment. These range from complete outages to intermittent flickering.
Network and connectivity problems follow closely as the second most reported issue. Loss of signal or unstable connections disrupt remote monitoring capabilities. This category includes both wired and wireless system failures.
Image and video quality degradation represents another major concern. Surprisingly, dirty lenses contribute to 80% of these clarity problems. Blurry or distorted footage compromises security effectiveness.
Environmental damage completes the primary categories. Hardware failures account for 30% of total system breakdowns. This includes physical wear, corrosion, and weather-related damage.
From Power Glitches to Blurry Images: Understanding the Root Causes
Voltage spikes and unstable current flow create most power irregularities. Inadequate wattage from transformers or faulty adapters often triggers shutdowns. Dedicated circuits and proper power management prevent these failures.
IP address conflicts and bandwidth limitations cause many connectivity issues. Incorrect network settings or router configurations block camera access. Wireless interference from other devices compounds these problems.
Incorrect camera settings frequently degrade image quality. Automatic features sometimes misadjust to Singapore’s variable lighting conditions. Manual calibration restores proper exposure and focus.
Cable degradation represents a silent but persistent threat. Moisture infiltration and physical wear weaken signal transmission over time. Regular inspection identifies deteriorating connections before complete failure occurs.
Understanding whether your CCTV equipment requires professional repair begins with identifying these root causes. Most surveillance headaches stem from identifiable sources within these categories.
Diagnosing and Solving Power Supply Failures
A stable electrical feed is the lifeblood of any reliable security monitoring system. When this power supply falters, your entire surveillance network can become vulnerable. Statistics show electrical inconsistencies affect 58% of malfunctioning equipment.
Identifying Symptoms: Flickering, Shutdowns, and No Power
Recognizing early warning signs helps prevent complete system failure. Intermittent flickering of camera LEDs often indicates voltage irregularities. Random reboots or shutdowns point to an unstable power source.
Complete blackouts where cameras show no signs of life signal a broken circuit or failed adapter. Infrared night vision failing to activate may stem from insufficient wattage. These symptoms demand immediate attention to restore security coverage.
Step-by-Step Guide to Checking Connections and Voltage
Begin diagnosis with a visual inspection of all physical connections. Look for frayed cables, loose plugs, or corroded terminals—common issues in humid climates. Ensure every connector sits snugly in its port.
Next, use a digital multimeter to check power levels at critical points. Test voltage at the adapter output first, then the junction box, and finally the camera input itself. Proper readings should match your equipment specifications.
Document any voltage drops between measurement points. Significant decreases often reveal damaged wiring or poor connections. This method pinpoints exactly where the power supply chain breaks down.
Implementing Stable Power Solutions: UPS, Dedicated Circuits, and Proper Wattage
Prevention beats reaction for power supply reliability. Install an Uninterruptible Power Supply (UPS) to maintain operation during outages. A 1500VA unit can protect up to eight cameras, providing crucial backup time.
Use dedicated electrical circuits for your surveillance system to prevent overloads. This isolation ensures other appliances don’t disrupt the clean power flow your camera network requires.
Match wattage precisely to equipment needs. Fixed models typically need 12W, while PTZ units demand 50W—four times more. Under-powering causes persistent problems and premature damage.
Power over Ethernet (PoE) switches offer streamlined delivery, providing up to 30W per port. They centralize power supply management while reducing cable clutter. Monthly audits of transformers and terminals form essential preventive maintenance.
Regular cleaning of corroded contacts in coastal areas prevents gradual performance degradation. These solutions transform unstable setups into resilient surveillance networks capable of withstanding Singapore’s challenging electrical environment.
Resolving Network and IP Connectivity Problems
A camera that cannot communicate with your network renders your security system useless. Network connectivity forms the digital backbone of modern IP-based surveillance. When this link fails, your monitoring capability disappears instantly.
Statistics reveal IP conflicts cause 28% of all surveillance outages. These connectivity problems frustrate homeowners and business operators across Singapore. Proper diagnosis and configuration restore reliable video feeds quickly.
https://www.youtube.com/watch?v=HMNe7XYg0_M
Step-by-Step Network Troubleshooting: Pinging Your Camera
Begin diagnosis by pinging each camera’s IP address from your computer. Open the command prompt and type “ping” followed by the device’s address. This simple test checks basic network communication.
Response times above 50 milliseconds indicate significant network lag. Timeout errors mean the camera receives no signal at all. Consistent packet loss points to unstable connections needing attention.
Successful pings confirm physical network connectivity exists. Failed attempts direct your focus to specific troubleshooting areas. This method isolates whether issues stem from the camera or network infrastructure.
Identifying and Fixing IP Address Conflicts
IP address conflicts create one of the most common connectivity problems. Multiple devices sharing the same address cause cameras to drop in and out. This manifests as intermittent loss of video feeds.
Check your router’s ARP table to identify duplicate addresses. Match each MAC address to its corresponding IP assignment. Assign unique static addresses to every surveillance camera.
Implementing static IPs prevents DHCP-related connection drops. This configuration ensures each camera maintains consistent network access. Proper subnet design resolves majority of these issues in dense urban environments.
Best Practices for Managing Bandwidth and Router Settings
Test available bandwidth before adding new cameras to your network. Allocate approximately 4Mbps per 1080p unit for smooth video streaming. Exceeding available capacity degrades overall system performance.
Enable Quality of Service settings on your router. Prioritize surveillance traffic over other internet activities. This ensures cameras receive necessary bandwidth during peak usage periods.
Configure VLANs for traffic isolation in multi-building setups. Separate security monitoring from general office or home networks. This segmentation improves both security and network performance.
Regularly audit router settings for optimal camera operation. Update firmware to maintain compatibility with modern surveillance equipment. These practices create a resilient network foundation for reliable monitoring.
Addressing PoE (Power Over Ethernet) Complications
The convenience of Power over Ethernet comes with a unique set of potential failure points in security setups. This technology delivers both data and electrical current through one cable. It simplifies installation but demands precise equipment matching.
When PoE fails, your entire surveillance network can become unstable. Understanding these specific complications helps maintain reliable monitoring. Proper setup prevents most frequent headaches.
Common PoE Delivery Failures and How to Spot Them
Recognizing early symptoms prevents complete camera dropout. Continuous boot cycling is a classic sign of voltage sag. The device repeatedly powers on and off without establishing a stable connection.
Poor night vision performance often indicates insufficient wattage. Infrared LEDs demand significant electrical current during darkness. Cameras may appear functional by day but fail after sunset.
Some units don’t power on at all despite proper network connections. This suggests a complete delivery failure at the switch port. A simple test with a PoE injector can confirm this issue.
Voltage drop over distance triggers many problems. Beyond 80-meter cable lengths, power degradation becomes noticeable. Active cameras at the far end of long runs suffer most.
Different PoE standards deliver varying wattage levels. The 802.3af standard provides 15.4 watts. 802.3at increases this to 30 watts for more demanding equipment.
The newest 802.3bt specification delivers up to 60 watts. This supports power-intensive PTZ models with heaters and complex mechanisms. Matching standards to camera requirements is essential.
Use a PoE tester to verify voltage delivery at the connection point. This tool measures actual power reaching each device. It identifies weak links in your electrical distribution chain.
Setting Up a Robust and Reliable PoE System for Demanding Cameras
Begin by calculating total power requirements for all cameras. Add a 20% buffer for future expansion needs. This prevents overloading your switch’s capacity.
Select the correct PoE switch based on camera demands. Deploy 802.3bt switches for PTZ models needing up to 60 watts. Standard fixed cameras usually perform well with 802.3at ports.
Install active PoE extenders at 70-meter intervals for longer runs. These devices boost voltage along extended cable paths. They prevent the reboot loops caused by power starvation.
Use shielded Cat6A cables to minimize electromagnetic interference. Singapore’s dense urban environment generates significant signal noise. Proper shielding maintains clean data transmission alongside power delivery.
Proper heat management extends switch longevity significantly. PoE equipment generates substantial warmth during operation. Ensure adequate ventilation in installation cabinets.
Consider these steps for optimal performance:
- Document each camera’s power draw specification
- Label all cables with length and destination
- Regularly test voltage at furthest connection points
- Monitor switch temperature during peak usage periods
Implementing these solutions creates a resilient foundation. Your surveillance system gains stability against PoE-related disruptions. Consistent power delivery ensures cameras operate at full capacity.
Fixing Poor Image and Video Quality Issues
Unclear video footage undermines the primary purpose of any surveillance system: reliable evidence collection. When image quality suffers, identifying faces, license plates, or specific actions becomes impossible.
This visual degradation often stems from simple, fixable causes. A surprising 80% of poor image complaints trace back to a dirty lens or protective dome.
Singapore’s unique lighting conditions add another layer of complexity. The system must handle intense midday sun and deep, shadowy corridors.
Eliminating Blurry, Distorted, or Flickering Footage
Begin troubleshooting with a physical inspection. Gently clean the camera lens with a microfiber cloth to remove dust, grease, and insect residue.
Ensure any plastic shipping cover has been completely removed. Check for condensation inside the housing, a frequent issue in our humid climate.
Flickering video often points to a lighting compatibility problem. It occurs when the camera‘s frame rate conflicts with the frequency of artificial light sources.
Adjust the anti-flicker setting in your CCTV software. Switch between 50Hz and 60Hz to find the setting that stabilizes the footage.
Optimizing Camera Settings for Singapore’s Lighting Conditions
Our equatorial environment demands a customized configuration approach. Standard factory settings rarely perform well here.
For areas with high contrast, manually adjust the exposure. This prevents bright skies from washing out the scene while keeping shadows visible.
Night vision performance requires careful calibration. Position infrared LEDs to avoid reflecting off nearby windows or walls.
Adjust the infrared cut filter (ICR) sensitivity. Set it to switch to night mode based on light levels, not just a timer.
Follow these steps for better after-dark images:
- Reduce overall digital gain to minimize video noise.
- Use a slower shutter speed to capture more ambient light.
- Angle the camera away from direct light sources like street lamps.
Correcting Faulty White Balance and Color Representation
Footage with unnatural blue or yellow tints indicates a white balance failure. Automatic features (AWB/ATW) can struggle with mixed lighting conditions.
When video resembles psychedelic colors, manual adjustment is necessary. Access the white balance setting in your camera‘s configuration menu.
Point the lens at a white piece of paper under the area’s primary light source. Use this reference to manually set the correct color temperature.
Cameras with ATW perform better when angled away from the vast sky, which can confuse the sensor. Repositioning often solves color issues instantly.
Clear, color-accurate footage is non-negotiable for effective surveillance. It ensures details like clothing color or vehicle paint are recorded truthfully.
This evidentiary quality transforms your CCTV system from a simple deterrent into a powerful investigative tool.
Preventing and Repairing Cabling and Wiring Faults
A surveillance network’s weakest link often lies not in the cameras themselves, but in the connections between them. These physical pathways carry both power and data, making their integrity non-negotiable for reliable operation.
When cabling fails, the entire security setup becomes vulnerable. Signal loss creates blind spots just as dangerous as a broken camera.
Impact of Cable Degradation in Singapore’s Humid Environment
Singapore’s tropical climate presents brutal challenges for surveillance wiring. High humidity accelerates corrosion within cable connectors and terminals.
Moisture penetration creates microscopic pathways for oxidation. This damage gradually weakens signal transmission quality over time.
RG59 coaxial cables deteriorate three times faster than Cat6 in these conditions. Their older design lacks modern protective sheathing against environmental factors.
Shielded Cat6 cables effectively resist electromagnetic interference from urban infrastructure. This includes interference from MRT tracks and dense electrical networks.
UV-resistant outdoor cables prevent sun damage to exterior installations. Direct sunlight breaks down plastic sheathing, exposing internal wires.
Fiber optics provide complete immunity to humidity problems. These cables transmit data using light rather than electrical signals.
Professional Cable Management and Waterproofing Techniques
Proper installation techniques dramatically extend cable lifespan in challenging environments. Strategic planning prevents most moisture-related failures before they occur.
Waterproof junction boxes with silicone sealing create essential barriers. These enclosures protect connection points from direct rain and condensation.
Creating drip loops prevents water from traveling along cables into sensitive equipment. This simple technique redirects moisture away from critical connections.
Gel-filled connectors prove essential for underground runs or conduit installations. The gel displaces air and blocks moisture entry at termination points.
Proper grounding reduces electrical interference by 70% in urban areas. This is particularly important near industrial zones or transportation corridors.
Follow these professional practices for optimal performance:
- Use conduit for all exterior cable runs exposed to elements
- Apply dielectric grease to metal connectors before installation
- Maintain minimum bend radius to prevent internal wire damage
- Label both ends of every cable for easy identification
- Install surge protection at cable entry points to buildings
Regular visual inspections catch minor issues before they escalate. Look for these warning signs during monthly checks:
- Fraying or cracking of exterior cable sheathing
- Green or white corrosion on copper connectors
- Animal chew marks, particularly from rodents
- Loose connections at camera or recorder terminals
- Water stains inside junction boxes or conduits
Consistent maintenance preserves signal integrity and prevents unexpected system failures. These proactive measures ensure your surveillance network remains operational through Singapore’s most demanding weather conditions.
Investing in quality cabling and professional installation pays long-term dividends. Your security monitoring performance depends on these often-overlooked components.
Managing Firmware and Software for Peak Performance
The digital intelligence behind your surveillance setup requires as much attention as the physical hardware. Firmware and software govern everything from image processing to network communication.
Outdated code creates vulnerabilities and reduces reliability. Regular updates transform a basic monitoring setup into a resilient security asset.
The Critical Importance of Regular Firmware Updates
Consistent firmware updates prevent 45% of security breaches in surveillance systems. These patches fix bugs, close vulnerabilities, and sometimes add new features.
Manufacturers release security patches every 90 days on average. Staying current ensures your equipment benefits from the latest improvements.
Hikvision systems use iVMS-4200 for centralized updates. Other brands provide web interfaces or dedicated management software.
Always backup configurations before installing any updates. This simple step saves hours of reconfiguration if something goes wrong.
The update process typically involves downloading firmware from the manufacturer’s website. Then upload it through the camera’s admin panel or central software.

Troubleshooting Common Software Glitches and Crashes
Codec mismatches account for 60% of Video Management System crashes. Ensure all cameras use compatible compression formats like H.265 or H.264.
Synchronize frame rates across all cameras for smooth operation. Mixed rates cause choppy playback and system instability.
Playback issues often stem from insufficient storage space. Calculate your needs based on resolution, frame rate, and retention period.
Ensure the recording PC or NVR has adequate resources. Insufficient RAM or CPU power leads to lag and dropped frames.
Software problems sometimes manifest as unexpected night vision failures. This occurs when settings conflict with automated switching routines.
Follow these steps when facing software instability:
- Check event logs for error patterns
- Verify all drivers and software are current
- Test playback on different devices
- Monitor system resource usage during peak times
- Create restore points before major configuration changes
Proactive digital maintenance keeps your surveillance network running smoothly. It prevents minor glitches from escalating into major outages.
Allocate time quarterly for software audits and updates. This routine ensures optimal performance and maximum security protection.
The Essential Role of Regular Maintenance and Reboots
Investing in preventive care transforms your security setup. It moves from reactive troubleshooting to reliable, uninterrupted operation.
A disciplined routine addresses minor issues before they escalate. This preserves your system‘s performance and extends equipment lifespan significantly.
Creating a Simple CCTV Maintenance Checklist
Establish a straightforward schedule for your surveillance equipment. Consistent checks catch problems early when solutions are simplest.
Perform monthly visual inspections of each camera. Clean lenses gently with a microfiber cloth to remove dust and condensation.
Verify that recording functions remain active on your DVR or NVR. Ensure all channels capture footage without gaps or errors.
Check date and time stamps for accuracy across your entire CCTV network. Incorrect timestamps can invalidate video evidence during investigations.
Conduct quarterly detailed examinations of physical components. Inspect cables and connections for signs of wear or corrosion.
Look for spider webs around housing units, especially in garden areas. These obstructions frequently cause false motion alerts and blurry images.
Test infrared night vision functionality during evening hours. Confirm LEDs activate properly and provide adequate illumination.
Review storage capacity and recording settings every three months. Adjust retention periods based on your security needs and available space.
Why Scheduled Reboots Prevent Glitches and Re-establish Connections
Periodic reboots offer a powerful technical refresh for your surveillance equipment. They clear accumulated memory leaks and reset network parameters.
This simple action resolves many unexplained performance issues. It re-establishes stable connections between cameras and recording devices.
Schedule a complete system restart during off-peak hours each month. Early Sunday mornings often work well for both homes and businesses.
Consider using smart plugs for remote reboot capability. These devices allow you to power cycle equipment without physical access.
Regular reboots prevent the gradual slowdown that affects all electronic systems over time. They restore optimal operation with minimal disruption.
Adopt these simple habits to maximize your security investment. Preventive maintenance ensures your CCTV setup remains dependable year after year.
Mitigating Environmental Factors in Singapore
A dedicated environmental protection strategy is essential for long-term monitoring reliability. Singapore’s climate actively tests the limits of outdoor security hardware.
Prolonged sun exposure causes image distortion in roughly 40% of outdoor units. Intense ultraviolet rays can destroy infrared filters within a single year.
High humidity creates severe corrosion problems for metal components. Coastal installations face accelerated damage from salt spray, especially during monsoon seasons.
Protecting Your System from Humidity, Salt, and Sun Exposure
Selecting the right equipment forms your first line of defense. Always choose cameras with an IP66 or IP67 rating for outdoor use.
This certification guarantees protection against powerful water jets and dust ingress. It is the minimum standard for reliable performance here.
Apply a specialized anti-corrosion spray to all metal brackets and connectors. This creates a protective barrier against moisture and salt air.
For lenses, install a simple sunshade or hood. This accessory prevents direct sun exposure, stopping “sun burnout” and preserving image sensor life.
Coastal areas demand extra vigilance. Salt spray accelerates oxidation far more quickly than humidity alone.
Consider cameras built with marine-grade stainless steel for these harsh conditions. Regular cleaning with a damp cloth removes salt residue.
Strategic Placement and Weatherproofing for Longevity
Thoughtful installation planning mitigates many environmental issues. Avoid mounting cameras where they face direct afternoon sun.
Position units under building eaves or soffits whenever possible. This provides crucial shade and some protection from driving rain.
Angle the lens downward slightly to minimize sky glare. This simple adjustment helps auto-exposure settings handle our variable lighting conditions.
Ensure all cable entry points are sealed with waterproof silicone gel. Use junction boxes rated for outdoor use to house connections.
Follow these steps for a resilient installation:
- Audit the site for direct sun paths and prevailing wind direction.
- Select mounting locations that offer natural overhead shelter.
- Use conduit for all external cable runs to prevent physical damage.
- Verify the camera housing’s seal is intact before final mounting.
Strategic placement prevents up to 60% of weather-related performance drops. It works alongside physical protections to ensure surveillance integrity.
Regular maintenance checks are vital. Inspect seals and housings every quarter for cracks or wear.
Wipe lenses clean to maintain clarity in our dusty, humid air. This proactive approach extends your system‘s operational life significantly.
Implementing these physical and strategic defenses transforms your setup. Your CCTV network becomes robust enough to withstand Singapore’s unique environmental challenges.
How to Fix CCTV Camera Issues: Simple Solutions for Common Problems
Before calling for professional help, try these basic troubleshooting steps for your security setup. Many monitoring problems have quick solutions you can implement yourself.
This guide provides immediate actions for the most frequent issues. Follow these steps to restore your surveillance quickly.
A Quick-Reference Guide for Fast Troubleshooting
Use this reference chart when your equipment malfunctions. Match symptoms with these first-response actions.
- No video signal: First, check power connections at the adapter and wall outlet. Verify the camera receives electricity by looking for indicator lights.
- Black screen on monitor: Inspect all cable connections between the camera and recorder. Ensure BNC or Ethernet plugs are fully seated.
- Flickering video footage: Adjust your camera settings for light sensitivity. Change the anti-flicker setting to match local power frequency.
- Incorrect color representation: Access the white balance menu in your CCTV software. Manually calibrate using a white reference object.
- Night vision not working: Ensure no physical obstruction blocks the infrared LEDs. Clean the lens and check for spider webs.
- Camera appears offline: Check camera IP address through your router admin panel. Ping the device to test network connectivity.
- Interrupted power supply: Test voltage at the transformer with a multimeter. Look for loose wiring or damaged adapters.
- Poor image quality: Gently clean the lens with a microfiber cloth. Remove any protective film that might remain.
When a Simple Reset or Adjustment is All You Need
The most overlooked solutions are often the simplest. Power cycling resolves numerous electronic issues instantly.
Turn off both the camera and NVR completely. Wait thirty seconds before restoring power. This clears temporary software glitches.
Many problems stem from incorrect configuration settings. A factory reset often fixes these without technical expertise.
Always backup your settings before performing a factory reset. This preserves your preferred configurations for restoration.
Adjustments to basic settings solve most video quality issues. Modify exposure, contrast, and sharpness in small increments.
Check your system for proper date and time stamps. Incorrect timestamps can invalidate surveillance footage during investigations.
Regularly check camera angles and positioning. Environmental changes like growing plants can obstruct views over time.
These basic procedures empower you to solve majority of monitoring problems. They restore functionality before considering hardware replacement.
Ensuring Your Surveillance System Stays Reliable
A proactive approach to security system management prevents most common monitoring failures. Understanding potential vulnerabilities empowers you to maintain consistent protection for your property.
Regular maintenance and environmental protection form your first line of defense. Combine these with timely software updates for optimal equipment performance. This routine stops many issues before they disrupt your surveillance.
DIY troubleshooting resolves numerous basic problems effectively. However, complex technical issues often require professional expertise. Reaching out for specialized support ensures your system receives proper care.
View your security setup as a long-term investment deserving regular attention. Consistent care guarantees reliable operation when you need it most. Your vigilance today ensures peace of mind tomorrow.
FAQ
What are the most frequent reasons a security camera goes offline?
The most common culprits are power supply failures and network connectivity problems. A loose cable, tripped circuit breaker, or faulty adapter can cut power. For IP cameras, a router reboot, IP address conflict, or bandwidth overload can disrupt the video feed.
How can I fix a blurry or distorted image on my surveillance system?
First, clean the camera lens with a microfiber cloth. Check the camera’s focus and resolution settings in its software. Poor lighting often causes grainy footage, so ensure the area is well-lit or use a model with strong infrared night vision capabilities.
Why does my CCTV footage look too dark or have strange colors at night?
This is typically a lighting conditions issue. Infrared LEDs on the camera may be obstructed, or external light sources can cause glare. Adjust the camera’s placement, clean the IR cover, and configure settings like night mode and white balance for better performance after dark.
What should I check if my PoE camera isn’t working?
A> Verify that your network switch or injector provides adequate Power over Ethernet wattage for the camera model. Use a cable tester to check for faults in the Ethernet cabling. Ensure the network cable is securely plugged into both the camera and a PoE-enabled port on your switch.
How often should I maintain my CCTV system?
Perform basic visual checks monthly. Clean camera housings and lenses quarterly to prevent dirt buildup. Schedule a professional inspection annually to verify cabling integrity, update firmware, and assess overall security system health, especially in humid climates.


